I think that this project has got to be one of my biggest transformations yet! I can’t wait to share it with you all! And you won’t believe how much (or how little) I spent on it! But before I give it all away, check out how I created “Pearls extreme makeover playhouse edition!”
I started looking a few months before my daughters birthday for a playhouse. I had seen some really cute ideas on Pinterest that really sparked my creativity. I knew I wanted something used (everyone knows just how fast these kiddos grow) so I thought it was pretty much pointless, spending a lot of money on something I would be changing up anyway.
I asked on my local community site (this way I knew it would be close & easy to transfer) if anyone had a wooden playhouse they would no longer need. I was super pleased to find a woman who did, and was so desperate to get rid of it that she had her husband actually delivery it to me! I paid her $20.00 and I was so eager to get my hands on this thing!
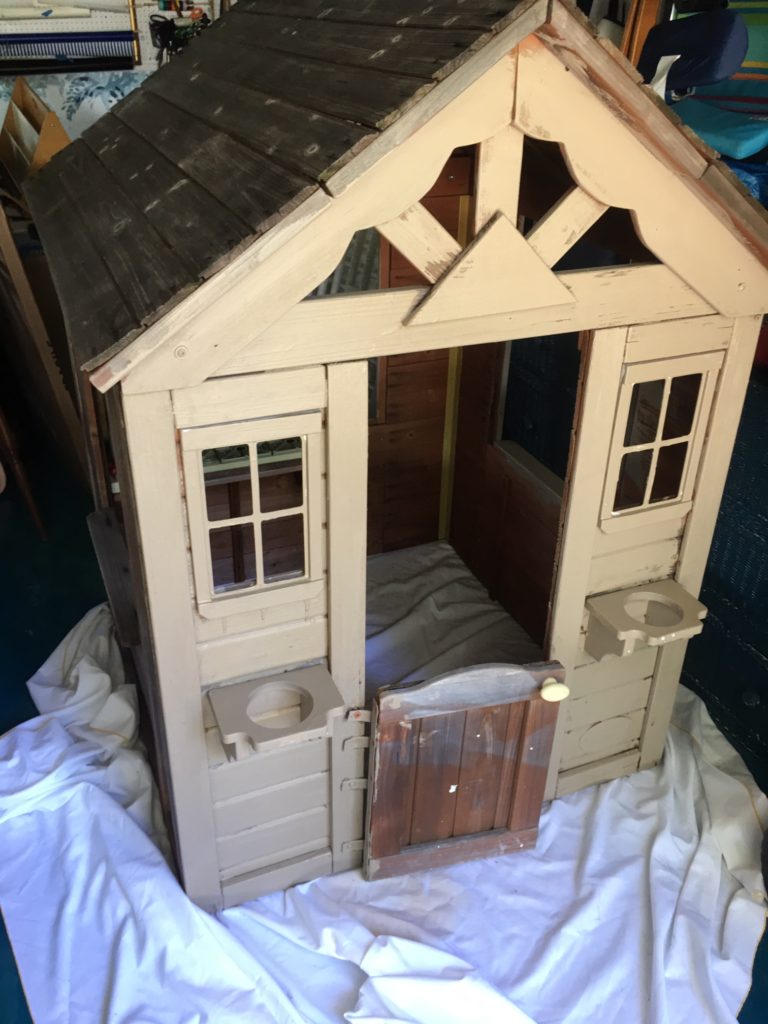
Primed and Prepped
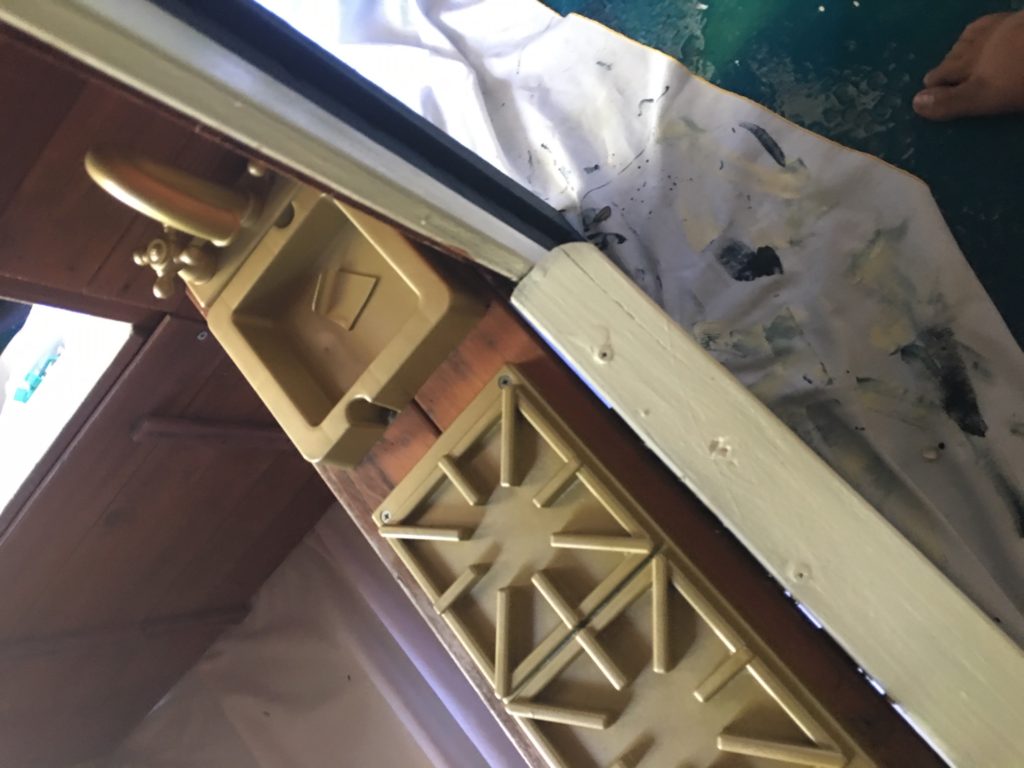
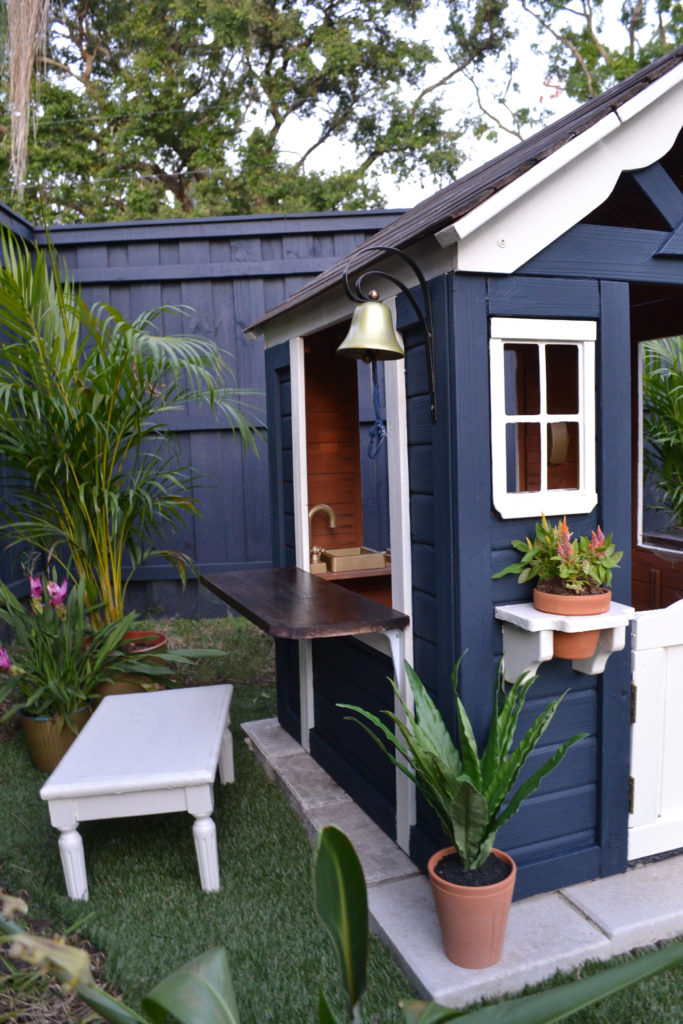
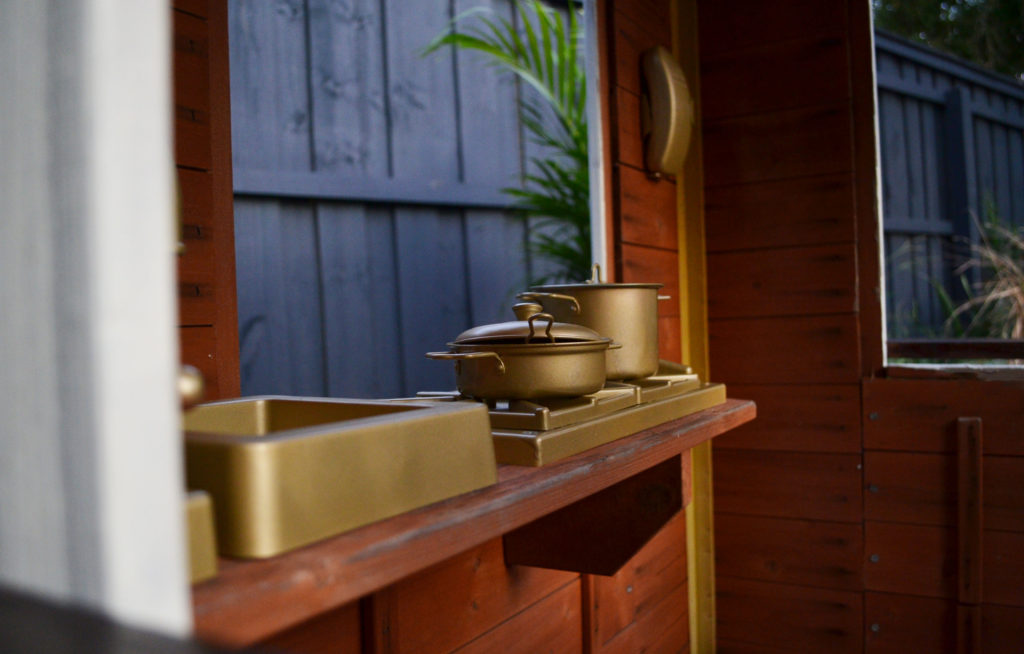
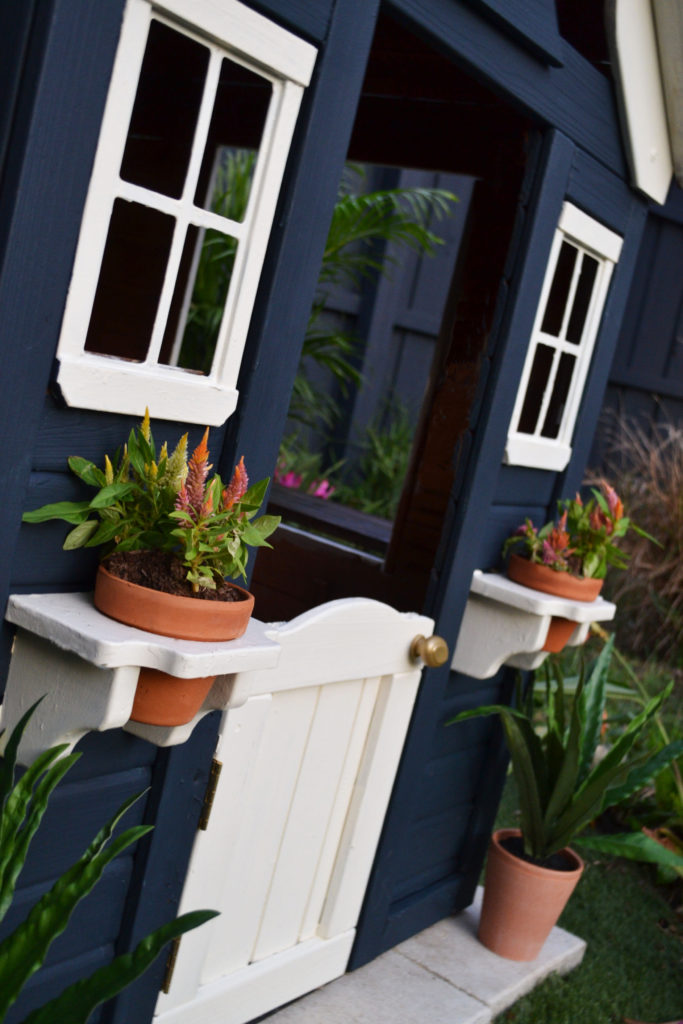
First thing was to disassemble all do the pieces. I took off the phone, sink, stove, and doorknob (super easy to unscrew) and spray painted them gold. I then took off the planter boxes and painted them white.
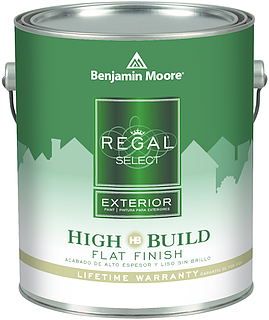
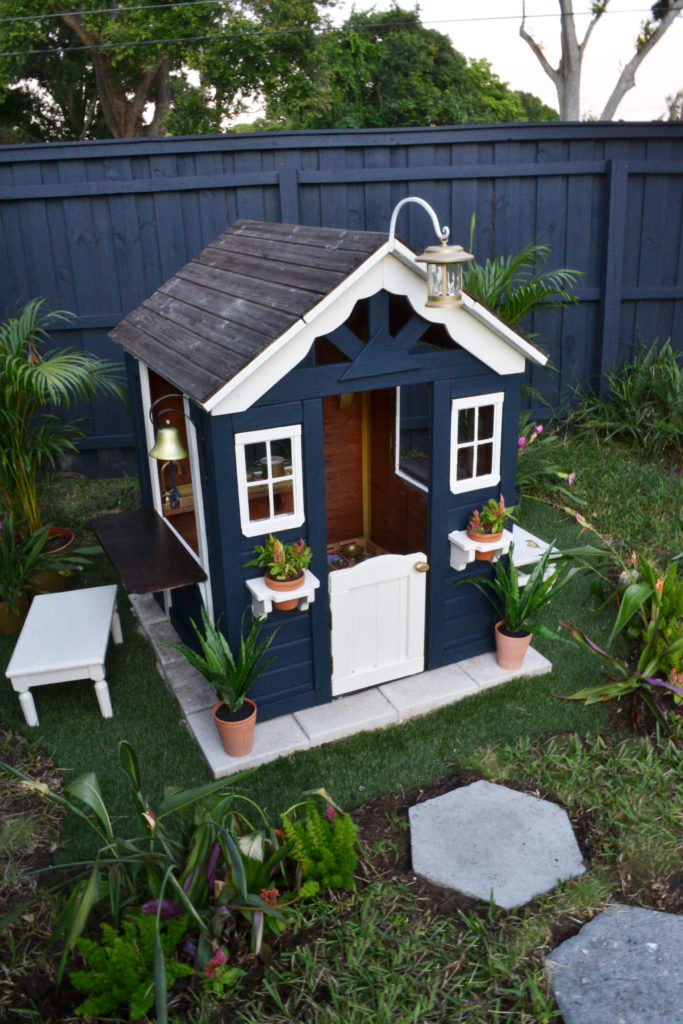
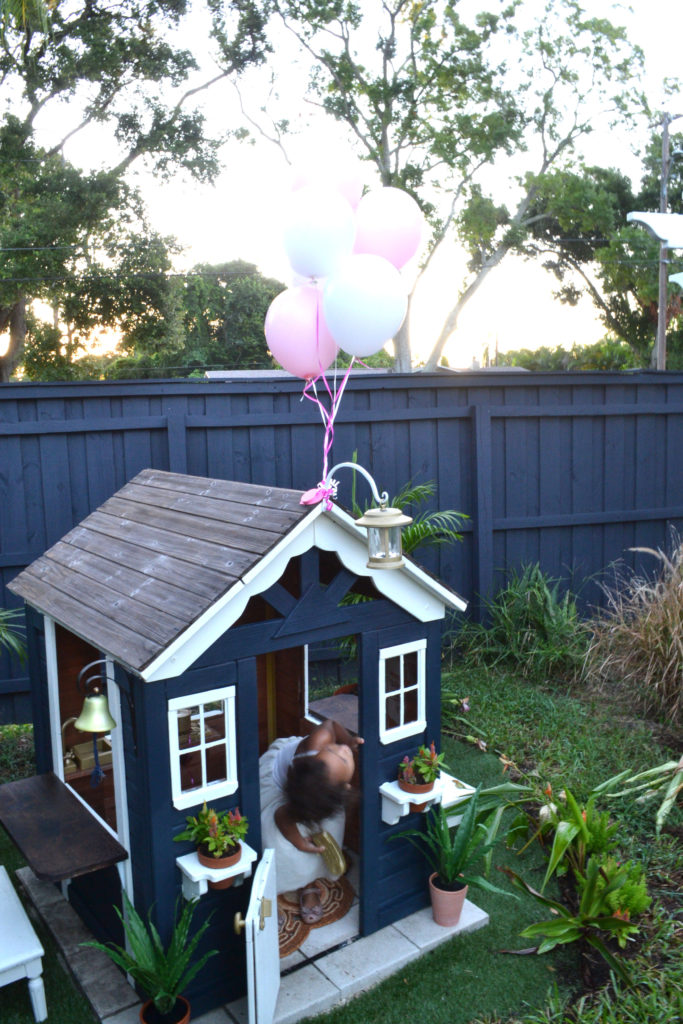
I had leftover exterior paint from Ace hardware called Regal Select for exteriors. It is a flat finish paint and had it tinted to the color “Polo Blue”. I cannot say enough good things about this paint. This isn’t a sponsored posts, so I can say with all honesty, it goes on smooth, its super-rich in color and it really lasts. Our fence was done a year and a half ago and still looks fantastic!
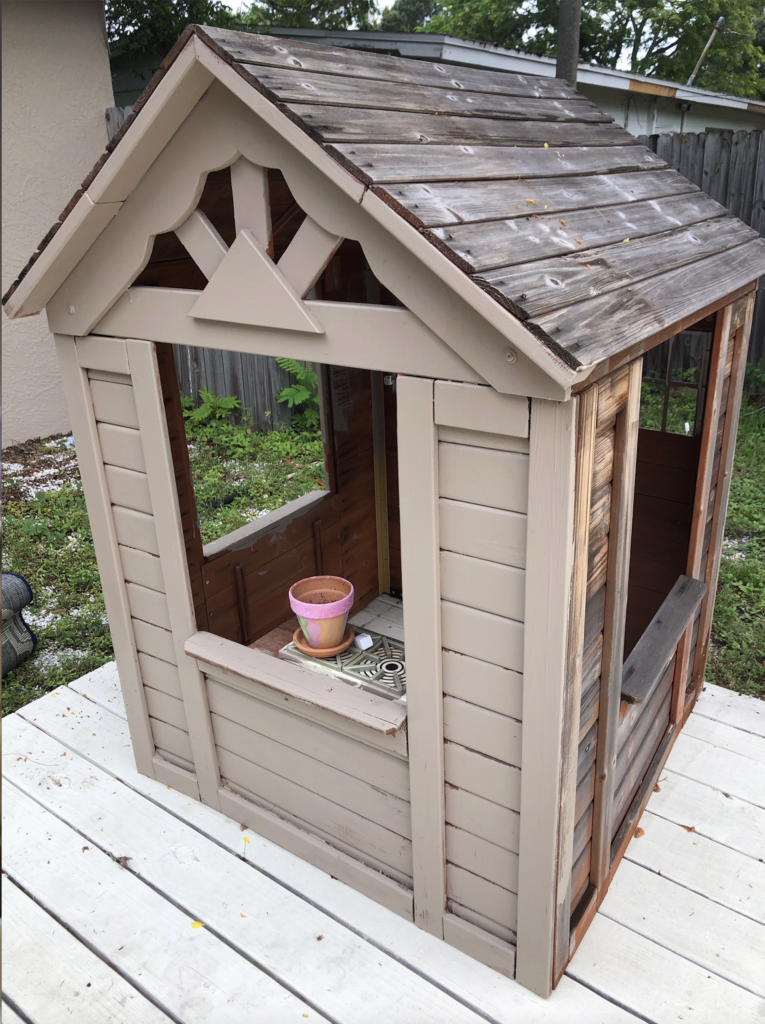
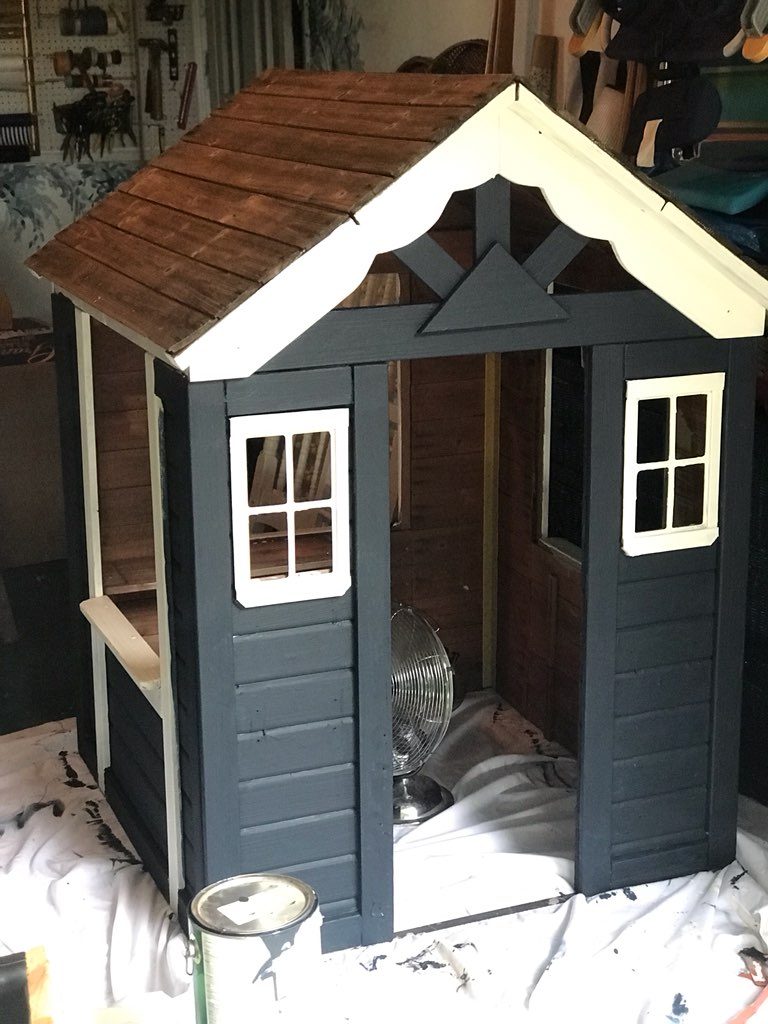
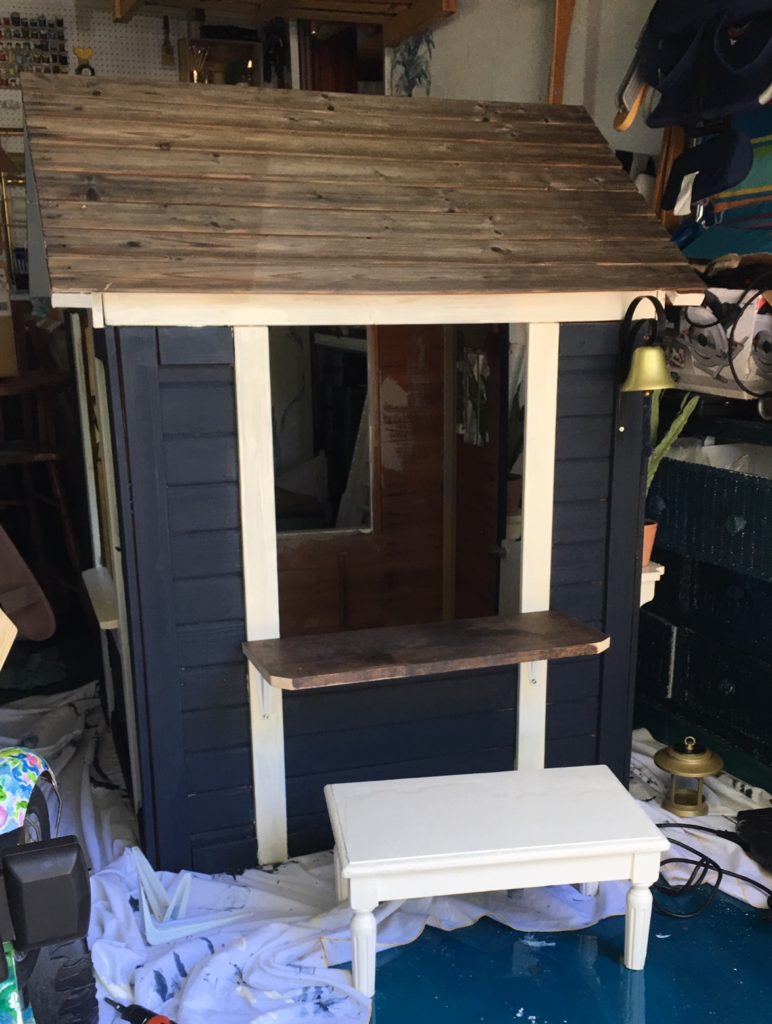
After I finished painting the main exterior, I worked on the frames. I painted those a leftover white trim that I had. I also painted the framing for the roof, as well as the door.
Now it was time for the fun stuff!
Assembly & Accessories
I re-assembled all of the gold kitchenware, plater boxes and door. It was really easy to screw back in and took about 15 minutes. The door needed a new hinge, so I picked one up from the local hardware store for about $3.00. Keep in mind – my total for this project so far has only been $23.00 because I used paint that I already had on hand.
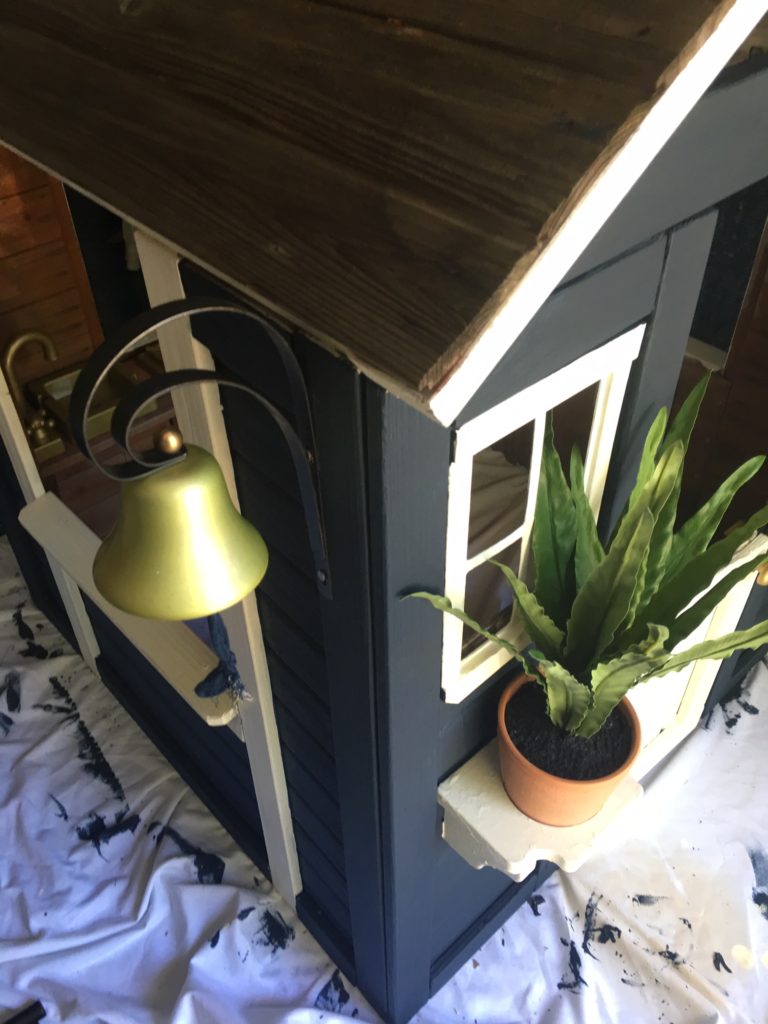
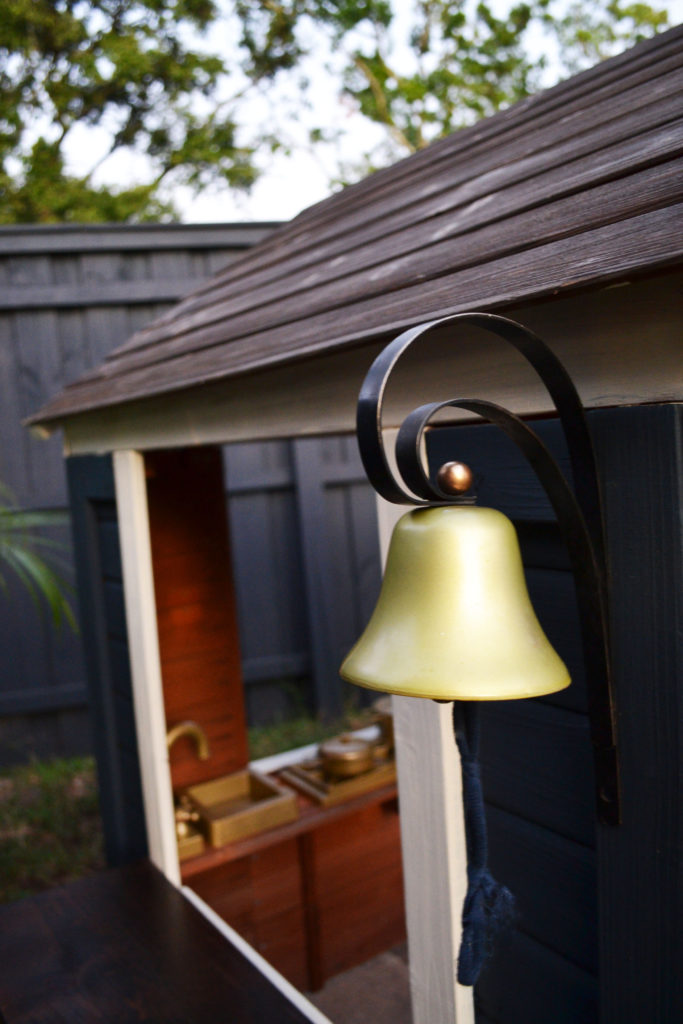
My mother had a bell that my grandmother had used to signal dinner was ready. The story goes, “Every kid on the street knew who’s parent was dinging the bell for dinner, by the noise it made.” I used some Brasso to clean it up a bit and once it was assembled, I teared up a bit. It made the house feel really special and something I could tell her about when she’s a little older and can understand.
Next, and very coincidentally, my neighbor had some furniture outside by the curb to be thrown out or found by someone like me. I feel like sometimes it is like divine intervention! One of the pieces was this piano bench. I took the fabric off the top, painted the top and the legs white then got to work.
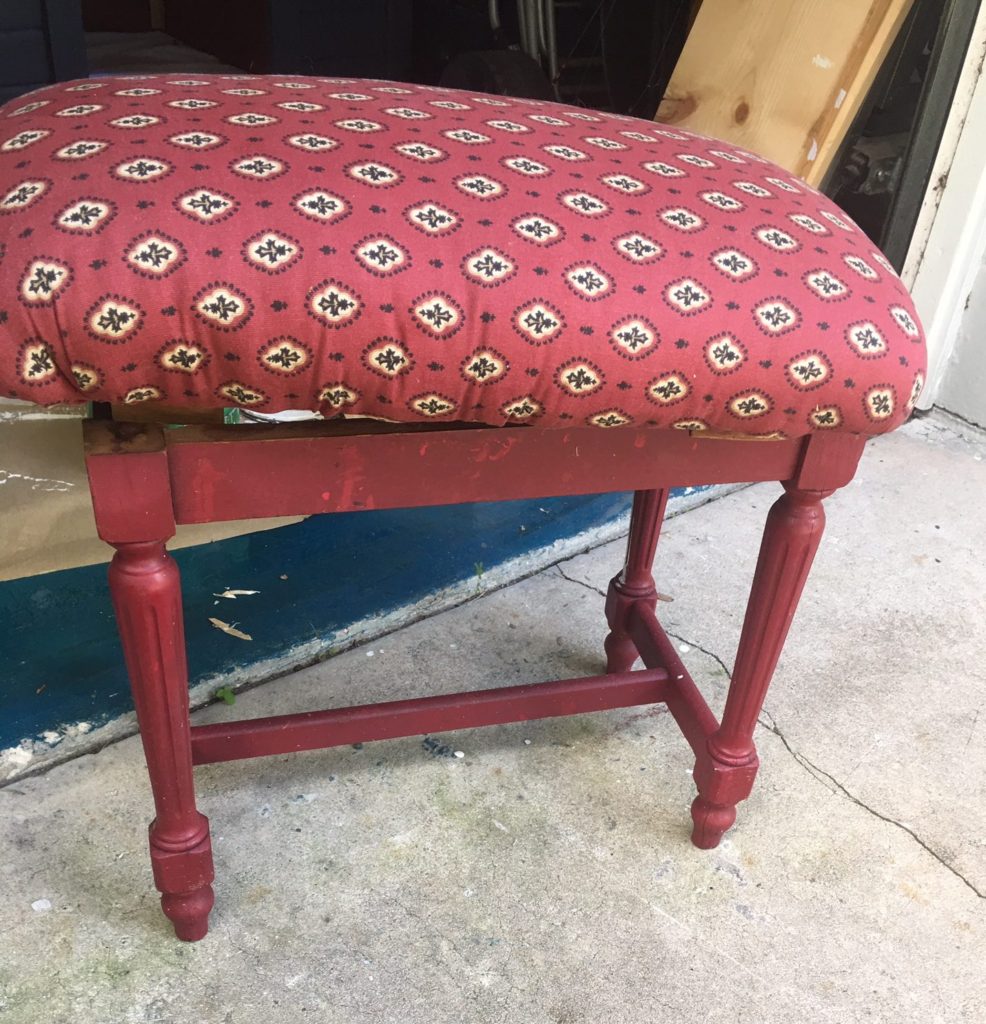
I cut the legs lengthwise, to make two sets. I was able to do this because of the “I” beam on the bottom on the bench. They help to create a more stable structure, and I knew I wanted and seat for either side of the house. I purchased an already cut piece of shelving ($3.00) at the local hardware store to make another top. I then sanded the edges smooth, painted it and screwed it on. Now I had two child height chairs perfect for either side of the house.
The side wings of the house were scrap pieces of shelving I had when I remade my laundry room over. I had already stained them, so I used an outdoor wood sealer to protect them better from the elements and let it dry. I purchased four brackets at $1.95 each and mounted the shelves to the left and right side of the house.
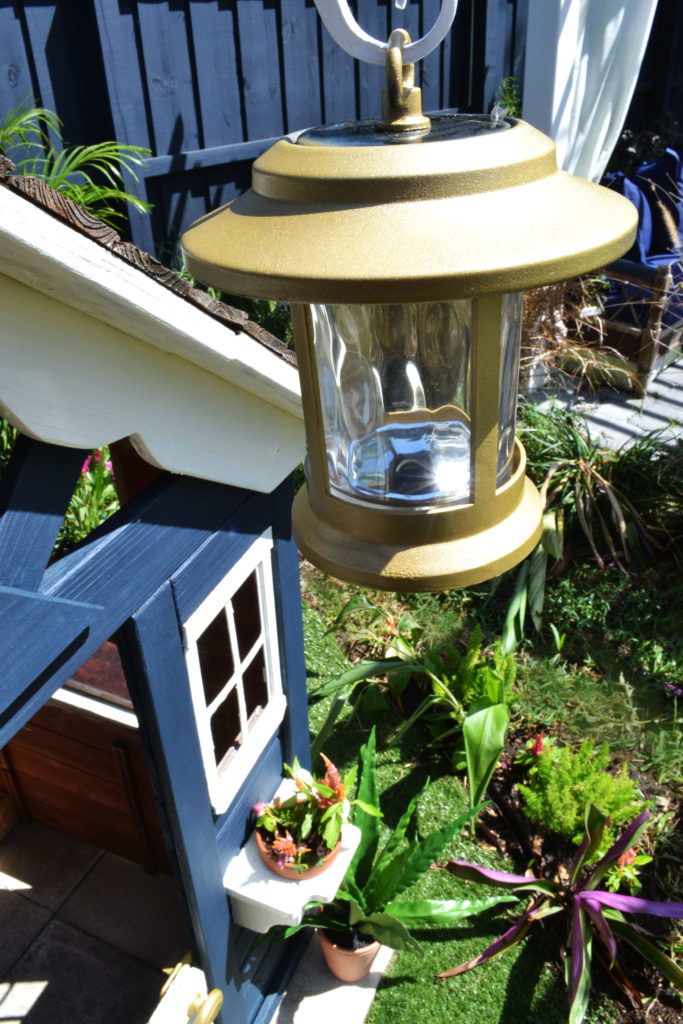
I also knew I wanted to add a little lighting, so I took a solar light I had in the garage, disassembled it, covered the “solar panel” and spray painted it gold. This particular light came in a box of 6. I used 4 others for my outdoor chandelier on my pergola (which I also spray painted white). It was perfect because it had a little circle hook to hang it from.

I used this hook from Amazon and attached it to the peak of the house. It is a perfect size and the light looked so cute. You can check out the link here.
Landscaping
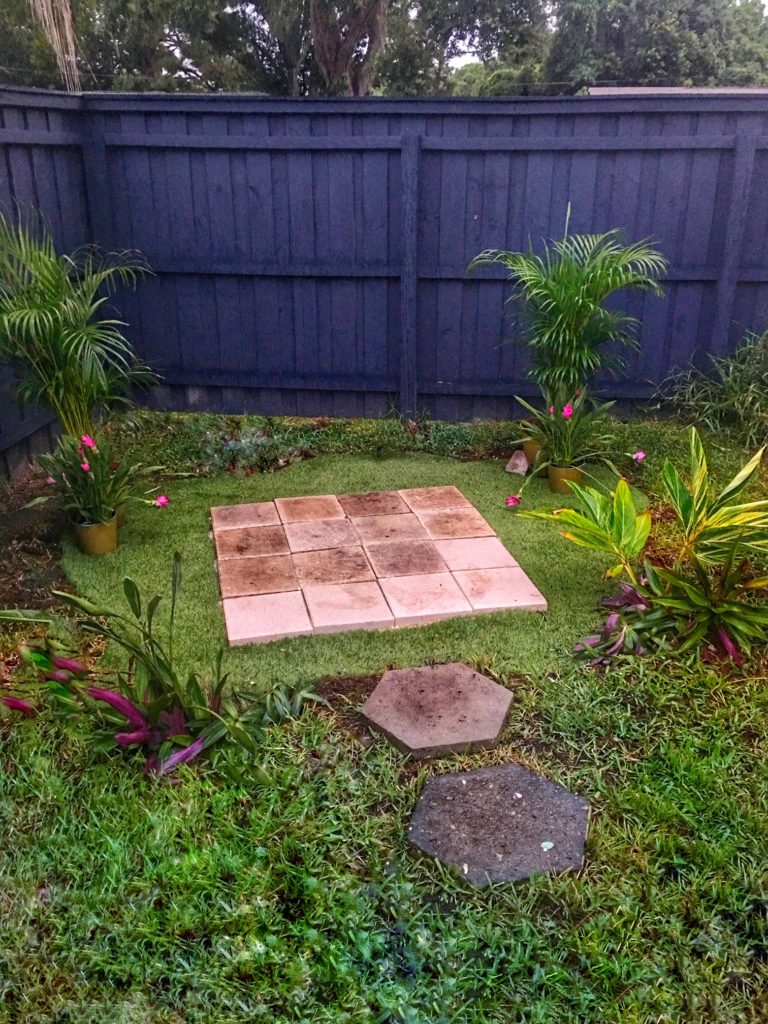
Now that the house was finished, we had to landscape where it was going to go. We have an irrigation system and sod in the backyard so we had to be careful where all of the lines were run. I found free pavers, again on a local sight. The person was re-doing their landscaping so I was free to take what I wanted. I needed 16 patio pavers in total. They also had a few hexagon pavers that I used as a little walkway. I power washed them and they looked good as new.
We layered a garden hose in the grass to create an organic shape around where the pavers were going. I didn’t want anything to be too perfect. The balance of the shape on the ground, with the structure of the square house, is generally more pleasing to the eye. We placed the pavers with a layer of structural gravel underneath, added some turf around the pavers and finished it up with the patio sand.
I added some outdoor Acreaca palms ($12.00 each ) and re-planted some other plants we had in our yard. I wanted to make it feel a little more tropical, and also block most of the irrigation spray from hitting the house.
The Reveal
I honestly love this piece so much. The little girl in me is dying for my own. A house with no bills??! How awesome does that sound! The grand total for this extreme makeover playhouse edition was about $63.00 dollars!


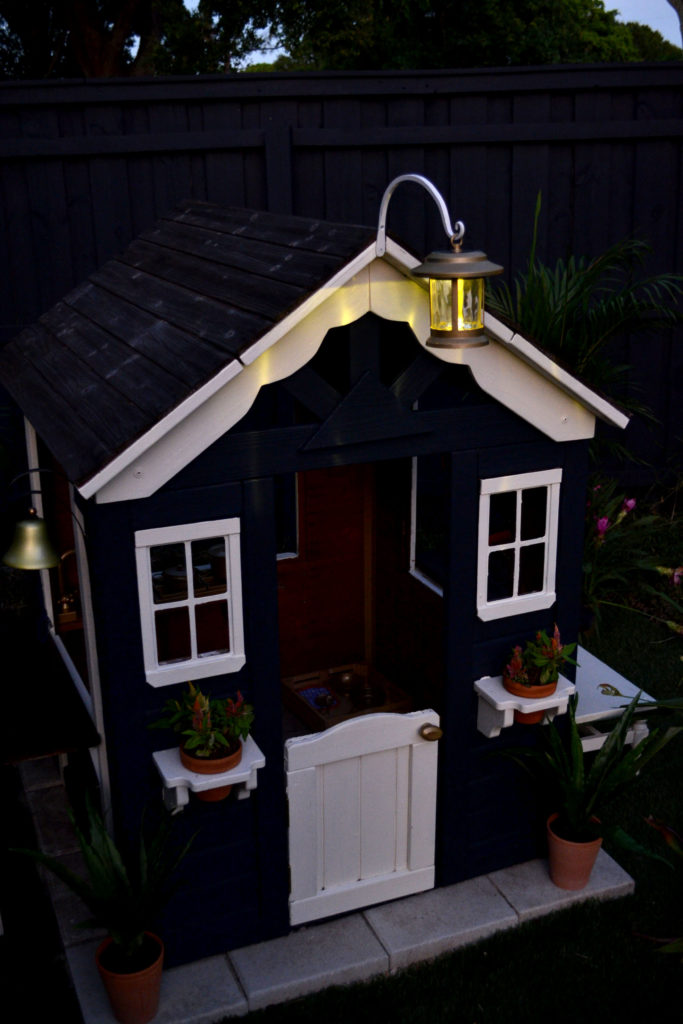
She loves it and the smile on her face, the morning of her birthday, made it all worthwhile!
If you have any questions or need help creating your own little playhouse, feel free to reach out.
Have a great week!

3 Comments on Pearls Playhouse
Leave a Reply
You must be logged in to post a comment.
Nice job Chelsea!
Thank you!
Comment