Florida Garage Space One Room Challenge~

Okay so, I think I’m starting to go a little bit crazy and I’m definitely ready for this project to be over and to actually be able to use the space. This past week was a pretty awesome one. I am able to finally see the light- literally!
Week 1 | Week 2 | Week 3| Week 4| Week 5 | Reveal
Window Removal!
For the strangest reason, the previous owner had covered up the largest window ever in the garage, I didn’t know what it looked like, I had never cleaned the outside of it- frankly because I never remembered it was there, and I also couldn’t notice it from the road. We have a bunch of tropical plants covering it and it was easily forgotten- UNTIL- this week. I thought the floor was my favorite, but that was until I removed a giant piece of plywood!!
My husband was a little hesitant of me removing it, because the door going from the garage into the sunroom is a bi-fold glass door, and then the door going into the kitchen is also a glass pane door. We could potentially lose a lot of privacy by removing the glass. I said, what the heck- let’s take a chance, I NEED natural light to do my paintings in- so it had to go.
Here is the before picture of the window!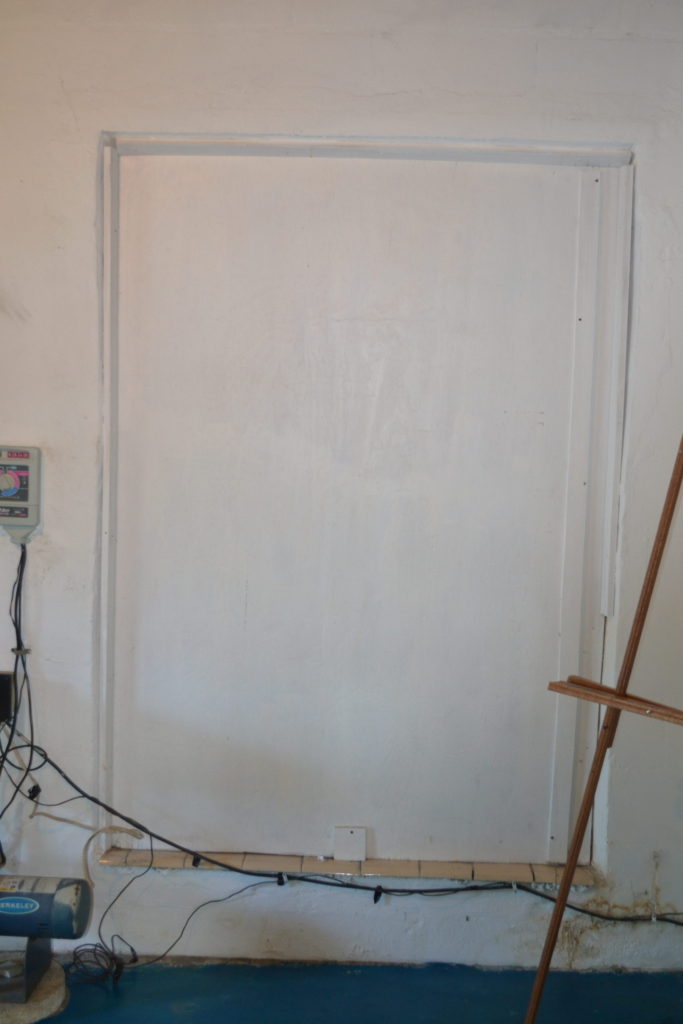
Also, all of that wiring is getting fixed this week, since our irrigation decided to stop working so that will all be fixed up and ready to go- hopefully by next week!
After easily removing the panels that were screwed into the concrete, it was time to get off that huge piece of plywood. I was finally able to do it after a good 35 min of prying- it did not want to budge. Finally once it was removed I was so shocked! Yes, the window looks disgustingly dirty- but the tropical plants!! *Gasp*-I was in love!! I couldn’t believe this view was hiding all along!
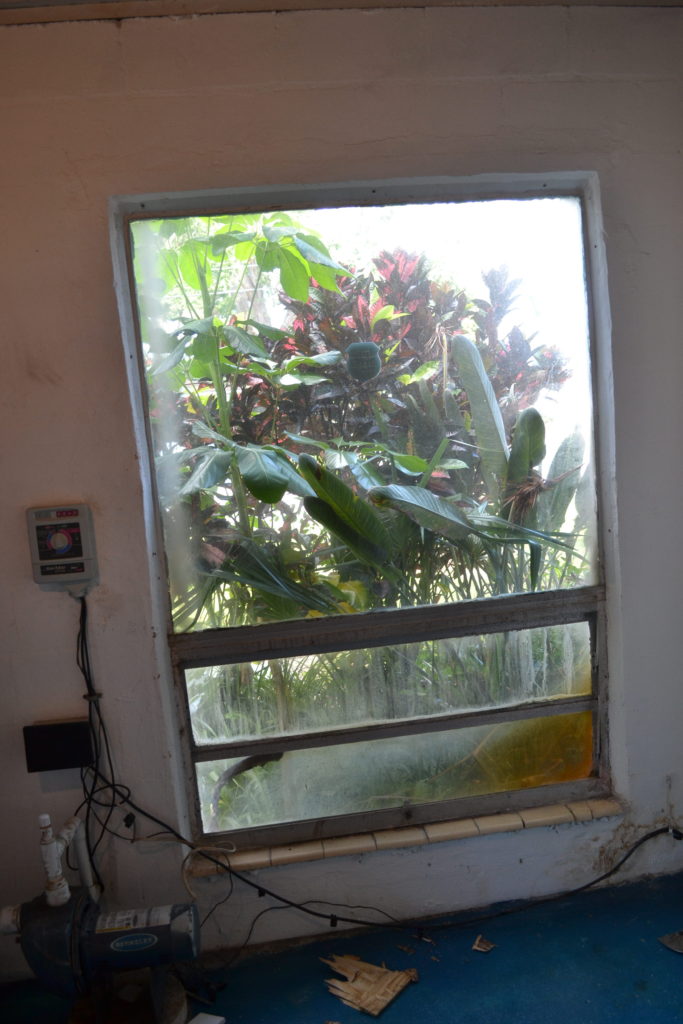
After A LOT of scrubbing, there was still some residual house paint and iron from the sprinkler system on the glass and here is the biggest tip/trick ever-
If you have anything that’s super stuck to glass- heat some white vinegar in a microwave-safe bowl, wear some gloves, and then dip a rag into it, and scrub a little and it will come right off! If its super stubborn use a razor at a 45-degree angle and that should do the trick! I was shocked at how well the vinegar worked! No more blue glass cleaner for me!!
Finally, I added a curtain rod and 108″ white cotton panels and here it is!
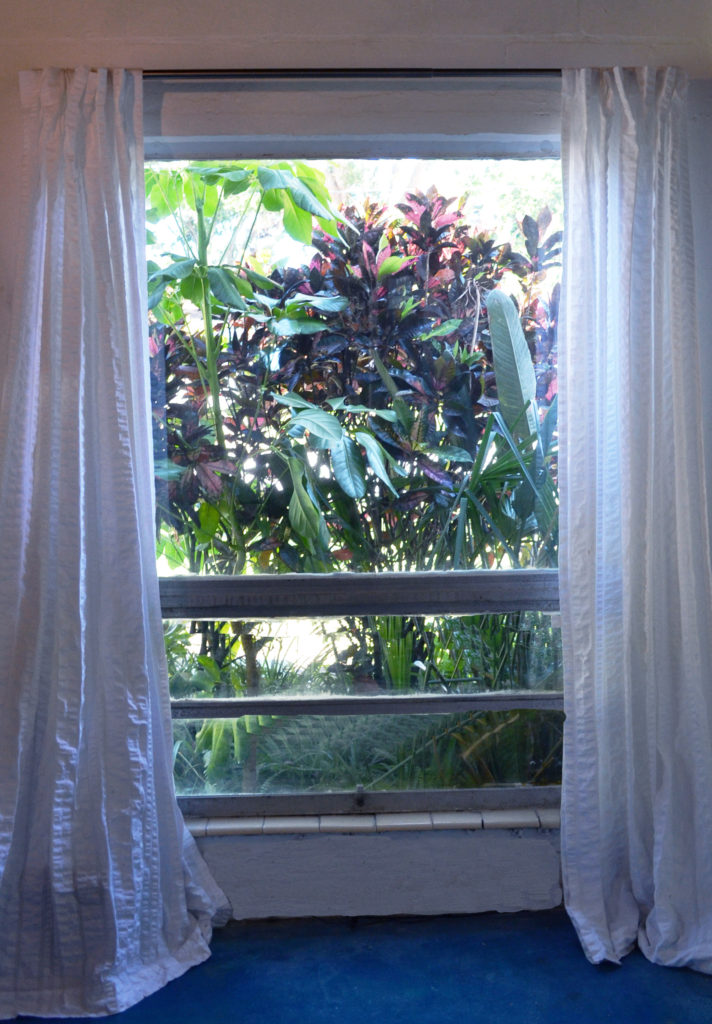
I love it! If we want the privacy we can always close the panels, but for now, the tropical plants do a fantastic job of “hiding” the area to the road. I should also mention we sit on a corner lot so we wanted to make sure that if we ever needed to have privacy it was available.
Here is a close up look of my soon to be new desk view! *Hey beautiful palm tree*
I’m excited about this window too because I am able to open the bottom- this window definitely looks original to the house- so probably about 70 years old, and after cleaning it, I also caulked around it. It is missing the crank, but once I find one of those, I’ll be using some WD 40 and a little patience to open this beauty up. Esp. when I do some oil painting!
D.I.Y Inspiration Board
I knew I wanted an inspiration board for the room, and when I was cleaning out the garage I had found an oversized corkboard, so I got to thinking, How could I D.I.Y something pretty but also useful for my space & work! Well, I came up with something pretty neat- take a look at the steps below!
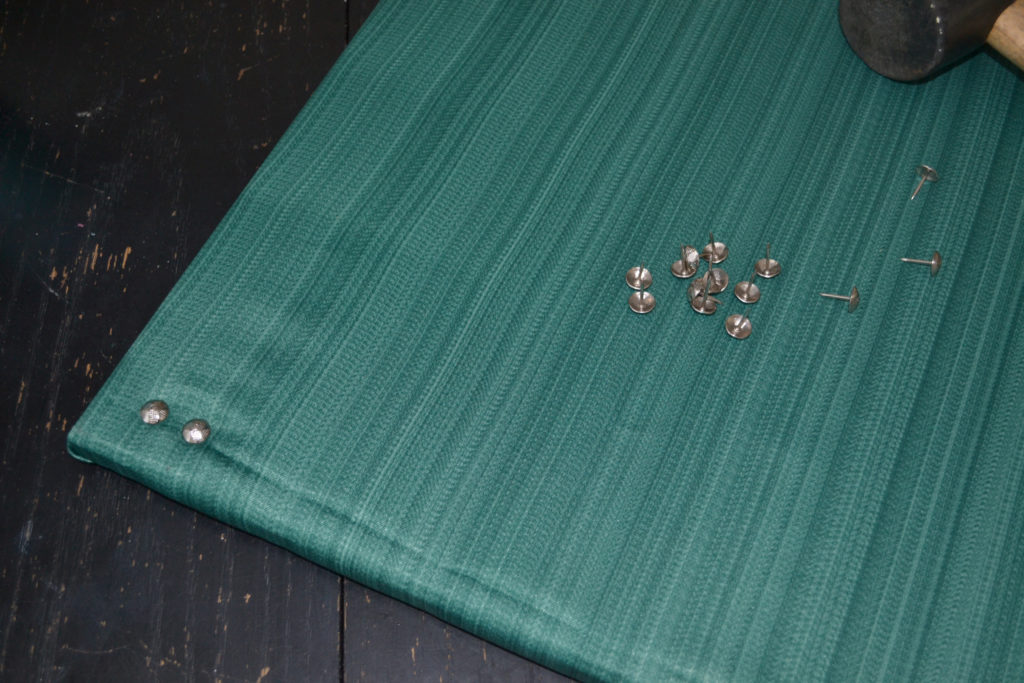
Materials;
![]()
Steps-
First, make sure you have enough batting to cover the top of your corkboard, and enough material to reach around the back. If you are using a pattern it is important to make sure it’s centered.
Spray the spray glue directly onto the cork, and place the batting on top. Let it dry for a few minutes before adding the fabric. 
Next, place the fabric, design side out, and staple to one side. Use your staple gun along one entire side, BEFORE doing the other side. Go to the opposite side you just finished, for example, if you started on the left, staple on the right side next. If you started at the top, then go to the bottom. Pull the fabric as tightly as you can. Continue to staple the rest of the sides until its completely covered.
Next, Add the nail-head pieces. You may need to use a ruler to make sure they are even. I am following along where my wooden edge meets the cork. I also used a mallet to help tap them into place.
Make sure when you’re done, everything is even. You can add picture handing accessories to the back if you plan on hanging it to the wall. 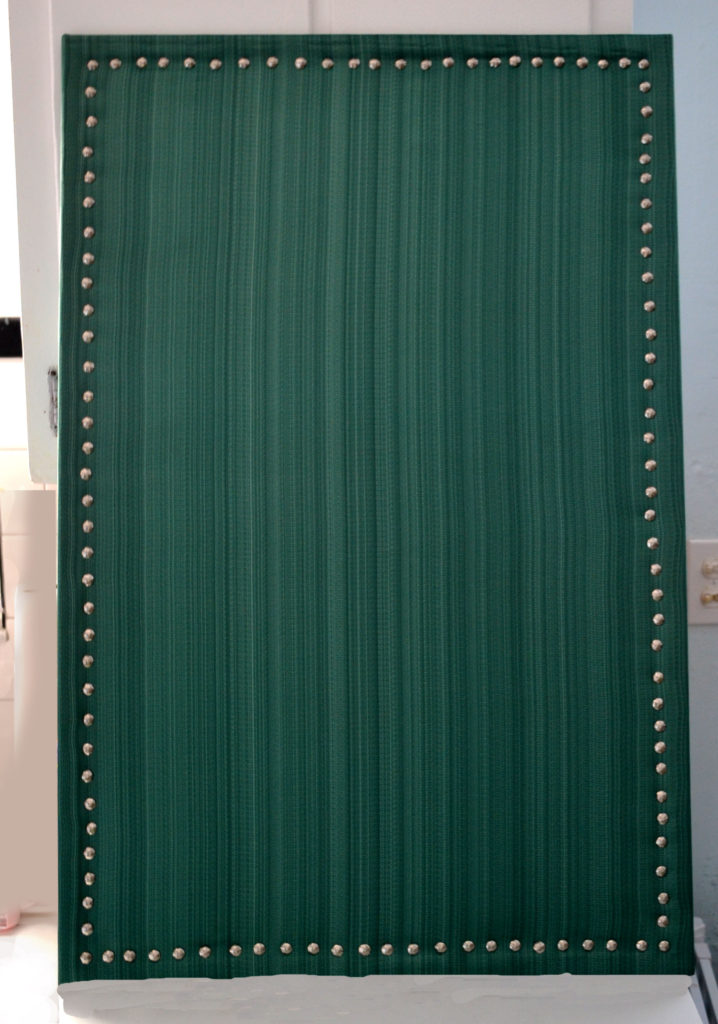
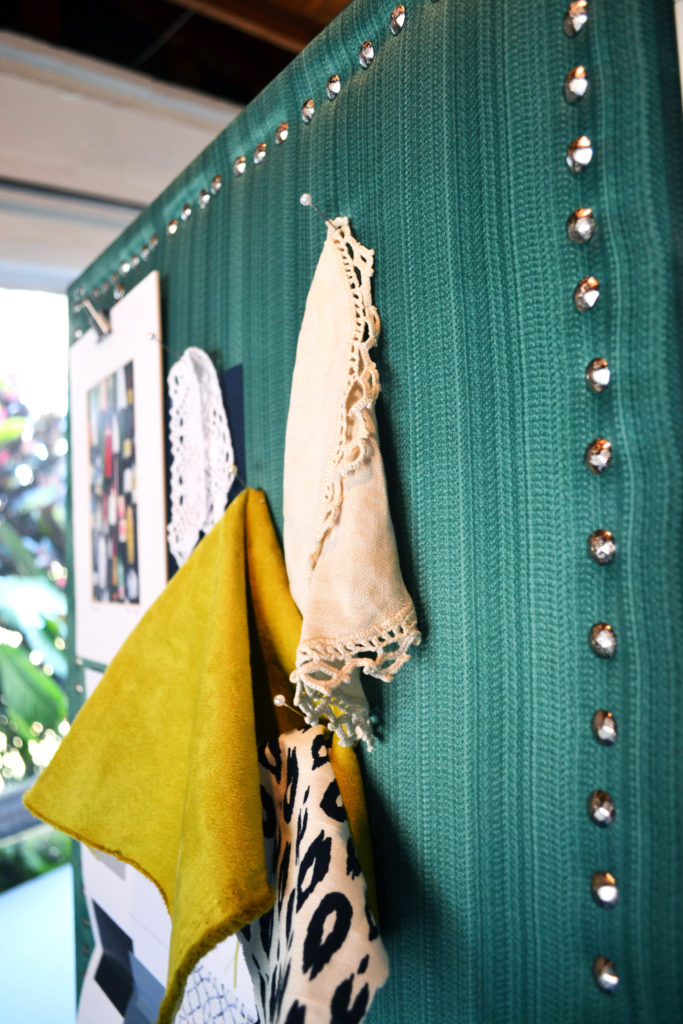
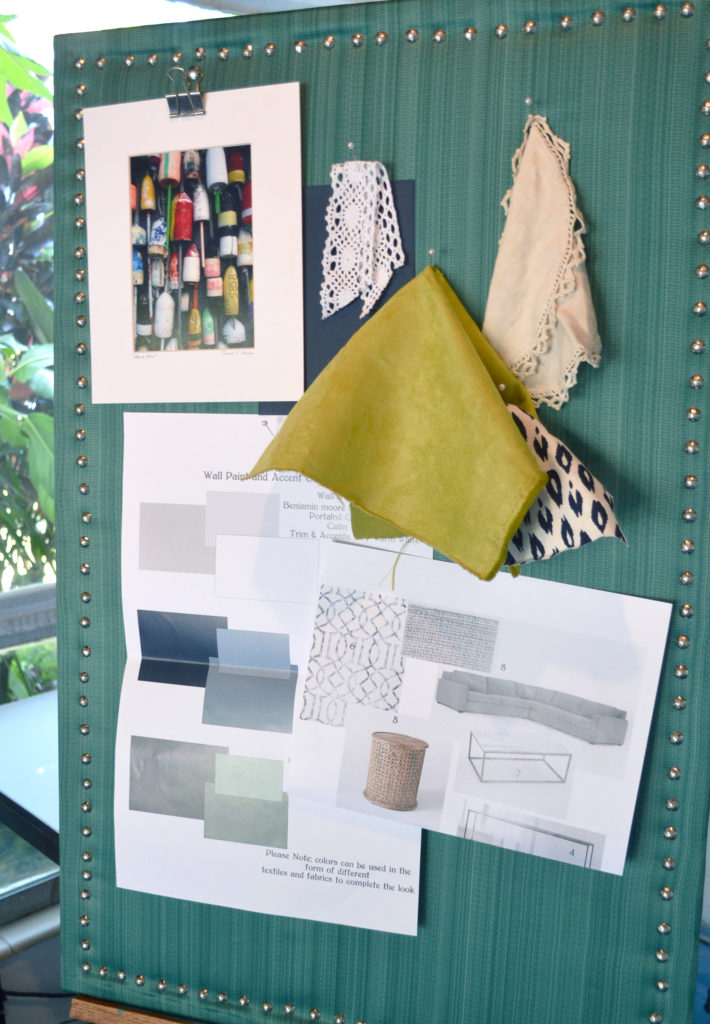
Lastly, begin to use it as your board. Add your inspiration pieces, renderings, whatever it is you need for your next project!
I’m happy with my progress so far, but I’m OVER the clutter everywhere else in my house, so I’m ready to finish up this project! Next week I’ll be showing you guys a little peg-board organization as well as another D.I.Y. But until then- Have a great week!
Don’t forget to follow along with me on Instagram!
I’m sure everyone else has been just as busy as I have! Be sure to check out what all of the other guest participants are planning for this week!
53 Comments on Grungy Garage Makeover -ORC Week 4!
Leave a Reply
You must be logged in to post a comment.
buy generic drugs from canada buy generic drugs cheap
cheap tadalafil tadalafil pharmacy
cheapest sildenafil buy sildenafil online
payday loans speedy cash payday loans online
personal loans for bad credit speedy cash payday loans online
tadalafil for sale cheap tadalafil
pain meds online without doctor prescription ed prescription drugs non prescription ed pills
best treatment for ed ed pills that work quickly mens erection pills
diabetes and ed ed drugs over the counter errection problems
mens erections ed meds online without doctor prescription male dysfunction treatment
cialis free trial buy cialis lowest cialis prices
cialis generic availability cialis for sale coupon for cialis by manufacturer
cialis discount card buy tadalafil cialis in canada
side effects for cialis buy cialis buy cialis online
causes for ed best medication for ed ed medicine online
prescription drugs online without doctor ED Pills best online canadian pharmacy
natural herbs for ed generic ed pills ed drug comparison
best drug for ed generic viagra canada ed drugs
male ed Cheap Erection Pills erection problems
hims ed pills generic cialis how can i order prescription drugs without a doctor
canadian drugs Cheap Erection Pills ed pills for sale
ed natural treatment generic ed pills compare ed drugs
ed men ED Pills ways to treat erectile dysfunction
best ed pills at gnc ED Pills pumps for ed
ed help online drugstore legal to buy prescription drugs without prescription
viagra walgreens canadian pharmacy viagra no prescription viagra
generic viagra walmart canadian pharmacy viagra viagra without a prescription
canadian online pharmacy viagra generic viagra mail order viagra
viagra cheap viagra where can i buy viagra
viagra coupon cheap ed pills viagra doses 200 mg
viagra online canadian pharmacy canadian pharmacy viagra canadian pharmacy generic viagra
viagra professional generic viagra viagra cialis
buy generic viagra buy generic drugs viagra doses 200 mg
online drugstore canadian pharmacy online ed products
pills erectile dysfunction new ed drugs generic viagra without a doctor prescription
online prescription for ed meds hims ed pills pills erectile dysfunction
online meds for ed ed medicine ed symptoms
where to buy viagra viagra low price best over the counter viagra
generic for viagra order generic viagra walmart viagra
cialis 20 mg best price generic cialis for sale generic cialis tadalafil
does cialis lower your blood pressure generic cialis for sale 30 mg cialis what happens
viagra cost per pill buy viagra generic buying viagra online
online viagra prescription sildenafil cheap viagra
online viagra canadian pharmacy viagra cheap viagra 100mg
is there a generic for viagra buy generic viagra online viagra cheap
That window!! Wow! What a statement!
Thanks! I really love it! ?
That window is a real gem, Chelsea! Thanks for sharing your inspiration board. I love the colors and textures.
I’m glad you like it!! I just love all of the new natural light! <3
That window is amazing and I LOVE the cork board! Great work!
Thank you!! <3